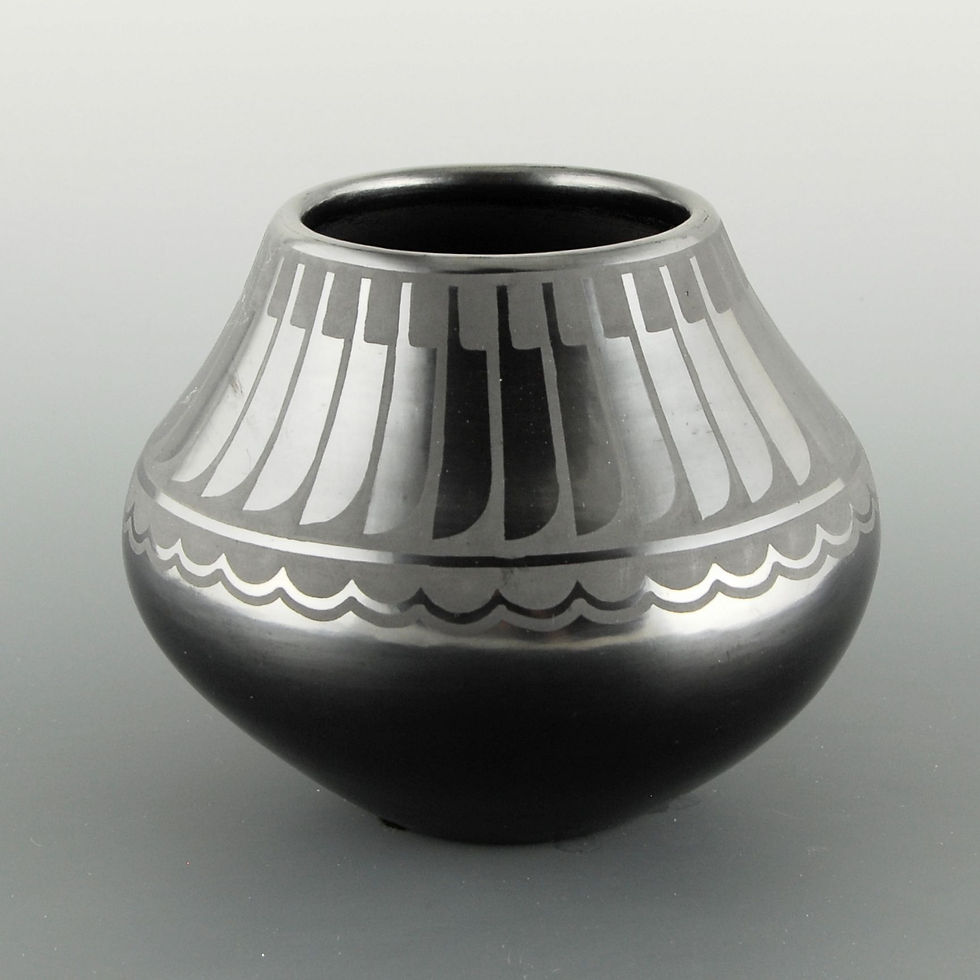
Testing black clay for next figure
My initial inspiration is taken from the black pots produced by Maria Martinez. She lived and worked in San Ildefonso, New Mexico, and is probably the best-known Pueblo potter.


Along with her husband, Julian, she developed and refined a way of turning red burnished clay pots into shiny black pots through the clever use of smoke firing. The initial smoke fired pots in 1910 were plain however by 1918 Julian and Maria Martinez started to add black-on-black decorated pots. The decorations were created by skilful burnishing techniques creating patterns through contrasting mat and highly shiny surface areas. The mat patterns were painted on top of the burnished surfaces using a refractory slip. The dark black carbonisation during was created during a bonfire style firing where the pots got covered with dried cow dung and smothered with ash creating a strong reduction atmosphere.


However, I will not attempt to recreate the processes involved but use it as an aesthetic inspiration. How can I achieve the difference between mat and high sheen? How do I get the blackness? This time I am looking at a way of making my decorations on a new black figure much more monochrome.
For my large figure finished earlier this year I used Valentine's PF680 Smooth black clay. It may work for my next project but I did encounter problems with the fit between the clay body and the white slip causing the white slip to break off. Also, the colour of the fired clay was more dark chocolatey brown than a proper black. So, I will try another black clay and see how I get on.
Let's try a systematic approach by making some test titles using four different clays in three different firings.
Top to bottom: VUF (Vulcan smooth), VUM (Vulcan medium), PF680 (black smooth) and PF670 (black textured).
Left to right: e/w ca 1060-1080°c, s/w in oxidation ca 1260c and s/w in reduction ca 1280°c.

I have used the same C1 s/w glaze for both oxidation and reduction firings and an e/w clear glaze on the lower firing. The front of the tiles show me how the clear glazes react with each clay and how the underglazes stand out after firing. More interesting perhaps are the reverse sides which show the colours of the bare clays. In reduction the hues definitely change from a brown to a black. It would be interesting to see whether the greyish colour of the VUM in reduction could be replicated or if this was just a fluke.
Test pot 1:


I stayed with the PF680 for this pinch pot to see have it would respond to using a limited colour palette for decorating, i.e. just black, white and brown design liner. Then I blocked out areas with wax resits and glazed it with a celadon s/w glaze and fired it in reduction to 1270°c.

Result: the clay body is actually much darker than when fired in oxidation. I did not expect the textured aged look, which I find really pleasing. There is a lot to like here but maybe not for this project.
Test pot 2:
This time I'm trying out the Vulcan smooth (VUF) black clay for this pinch pot. First off I notice that it is really nice to work with and I spent a lot of time refining this pot and burnishing it with a glass pebble.


Along the bottom part I added texture by using the shellac/water etching method. I thought this may be a way of replicating the black-on-black decorating effect found on Maria Martinez's pots. After bisque firing I added black and white decorations with design liner and a thin wash of white underglaze into which I scratched more pattern details. Once they were dry I applied a pattern with latex resist (yellowish in colour) before applying the C1 clear glossy s/w glaze. I then peeled off the latex to leave distinct areas with glaze and unglazed which partially left some of the underglazes unglazed.

This is the result after it came out of the electric kiln fired to ca 1260°c. It may not be a copy of the Pueblo black-on-black ware but it has shown me quite a lot potential.

The thinly applied white underglaze looks best when it isn't glazed. I do like the sgraffito decoration below the glaze but the unevenness of the white is distracting. Maybe I could mask it out and apply more evenly with a sponge.
When applying the masking fluid it is important to have very straight lines without wiggles.
The burnished surface looses its sheen after glaze firing.
Even though I like the textured area around the base of the pot I don't think it works with the rest of the decorations on this pot. Either I find a better way to integrate it or use it just by itself.
Using the masking fluid to create pattern through glazed and unglazed areas actually worked. I like the way the glaze pools slightly thicker around the bare areas. Maybe this was just luck and the glaze could run if fired slightly higher or the pot sitting in a hotter part of the kiln. Would need to test this again before applying to a large piece.

On one side of top the glaze had lots of little air bubbles. I don't really mind this but I need to make sure I only get it when desired.
I am not sure whether VUF clay lends itself to building larger figures. I may try using the VUM clay, which should have more grog in it. I can always apply a slip of VUF if I want that smooth surface finish. Being nearly the same clays should ensure a decent fit.


